Hardware Assembiles
This post seeks to define the parts, materials and techniques for producing the following hardware assemblies for the collaborator gloves:
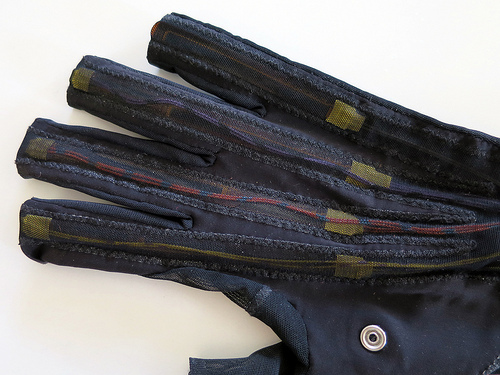
(1) Bend Sensor Assembly
(2) Ring Button Assembly
(3) LED Strip Assembly
(4) Motor Board Assemblies
(5) AA Battery Assembly

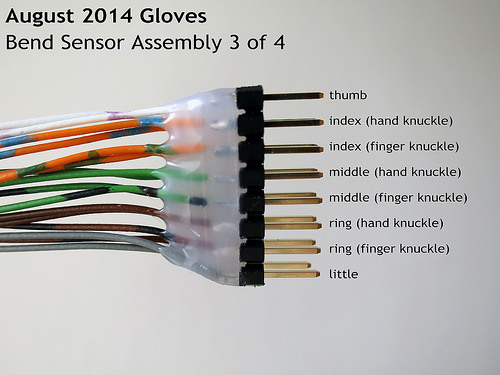
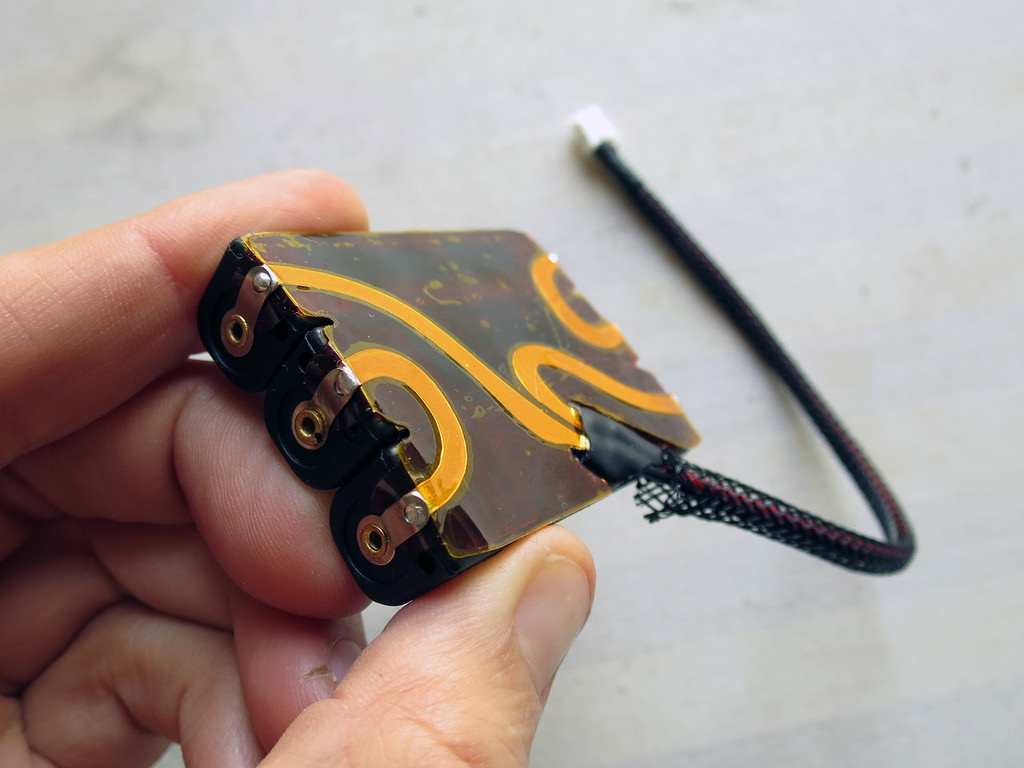
(1) Bend Sensor Assembly
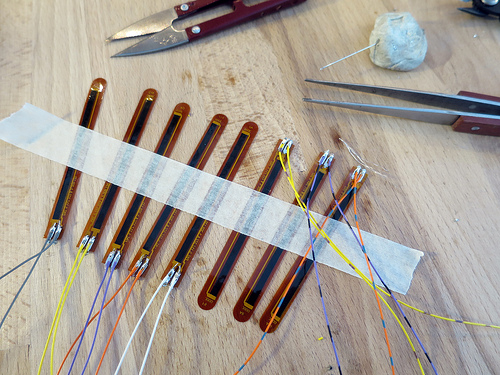
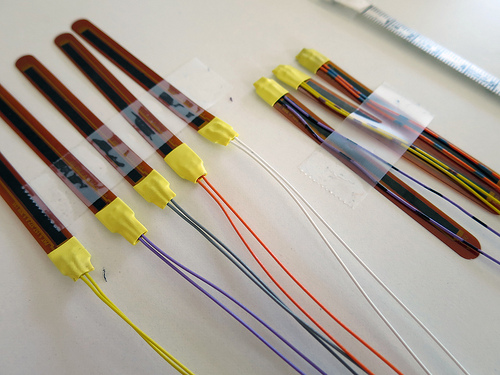
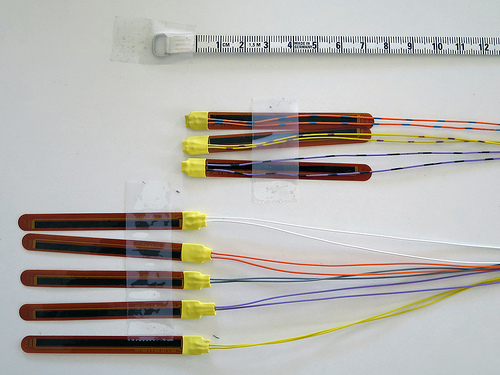
The bend sensor assembiles are made up of 8 bend sensors per assembly. Each sensor has two wires of identical length. The 5 hand knuckle sensors have 18cm long wires, the 3 finger knuckle sensors have 30cm long wires. One wire of each sensor is connected to an 8-pol mini JST connector row that goes to GND. The other wire of each sensor is connected to an 8-pol mini JST connector row that goes to the input pins of the x-OSC.
On the end of the bend sensor the wires are soldered to the bend sensor leads. Finger knuckle sensor leads are soldered to exit the sensor along the length of the sensor. Hand knuckle sensor leads are soldered to exit the sensor away from the sensor.
Parts:
- Flexpoint 3” polyimide laminate with NO blue connector attached!
- Shrink tube: SS 6,0/3:1 IK-1,2m — http://www.segor.de/shop?Q=$:25093
Part number: CMP250
>> http://www.eibmarkt.com/en/products/ABB-Stotz-S-J-T-B-Thin-walled-shrink-tubing-6-4-3-2mm-CMP250-9-A.html
>> http://en.elektrotools.de/Product/Heat-shrink-tubing-Thin-walled-2-1-6-4-mm-7TCA017300R0099
manufacturer >> http://www.tnb.com/pub/index.php
- Neoprene
>> http://sedochemicals.de/
- Cable loom
>> http://www.connect2t.co.uk/
Cable Loom:
These are the lengths i cut before stripping about 4mm off each end and soldering:
white (thumb): 18cm
yellow (index hk): 18cm
yellow stripe (index fk): 30cm
orange (middle hk): 18cm
orange stripe (middle fk): 30cm
purple (ring hk): 18cm
purple stripe (ring fk): 30cm
grey (little): 18cm
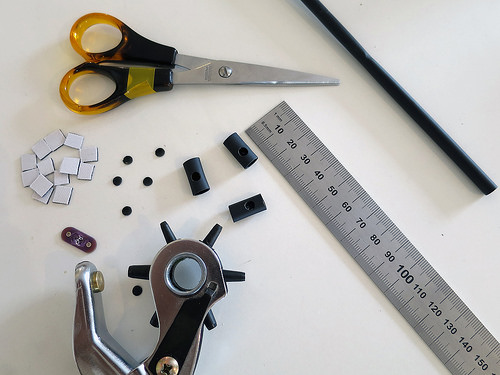
Shrink tube:
6mm diameter, cut to 11mm lengths
- hot melt glue on inside
- good shrink ratio
- minimal material thickness
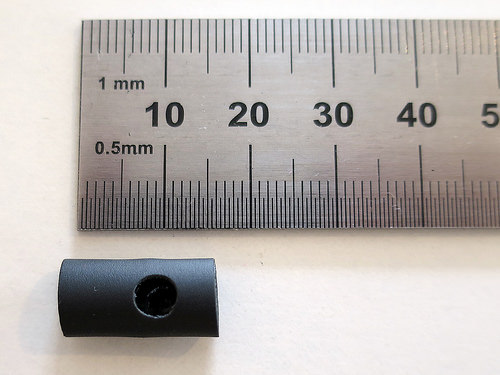
Images:
Before soldering remove extra metal from connector clipping off or bending back and forth until comes off.
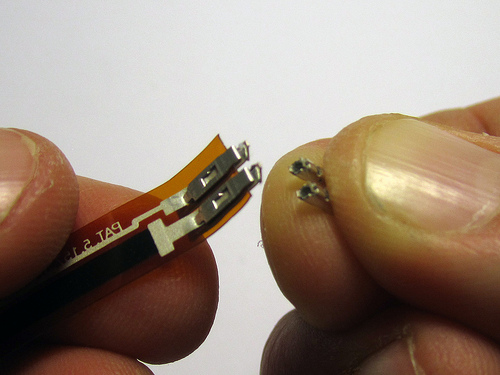
Wires should be soldered to top side of sensors! (Top side = print side up!)
5 Hand knuckle sensor leads exit away from the sensor.
3 Finger knuckle sensor leads exit along the length of the sensor.
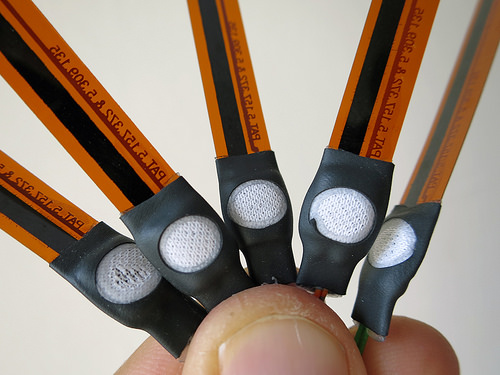
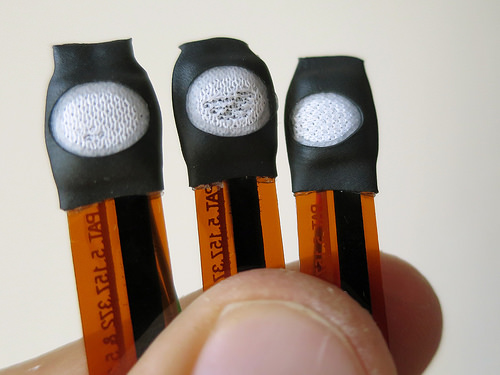
Roughly 15mm long piece of 6mm diameter shrink tube with hot-melt adhesive 3:1 shrink ratio. Hole is 4.5mm diameter (could maybe be 4mm or even 3mm). Distance from edge of shirnk tube to edge of hole on one side is 3.5mm, on other side 7mm. 9×9 mm square of 1mm thick neoprene with jersey fabric fused to either side. Square of neoprene is inserted under hole and then tube is shrunk. Because the fabric on neoprene is polyester jersey it melts if affected by hot air from shrinking tube. could be good to find fabric with less synthetic jersey.
Neoprene fabric should hold very well so that stitching to it does not cause it to come loose!
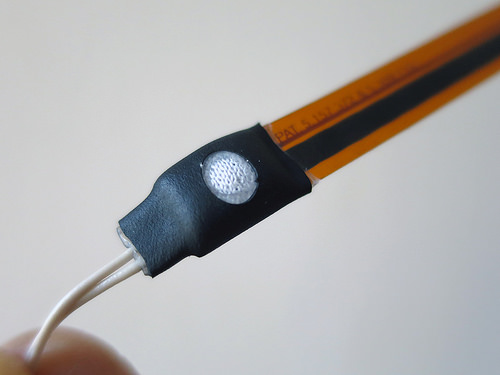
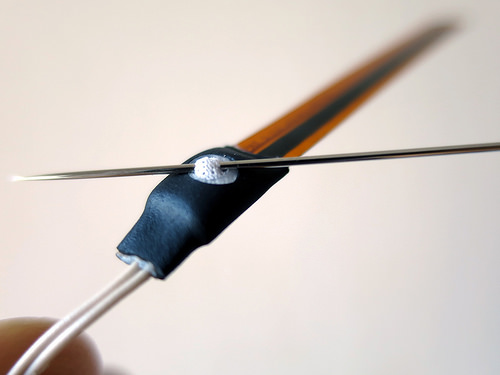
Images that show how wires are soldered to sensors:

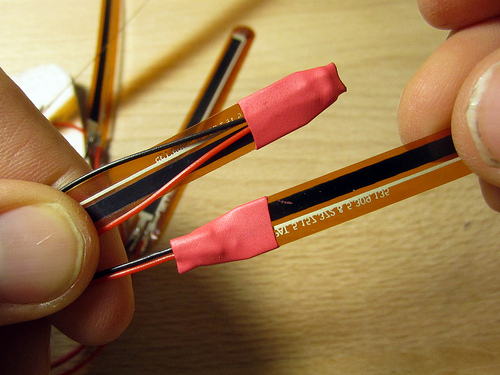
Connections:
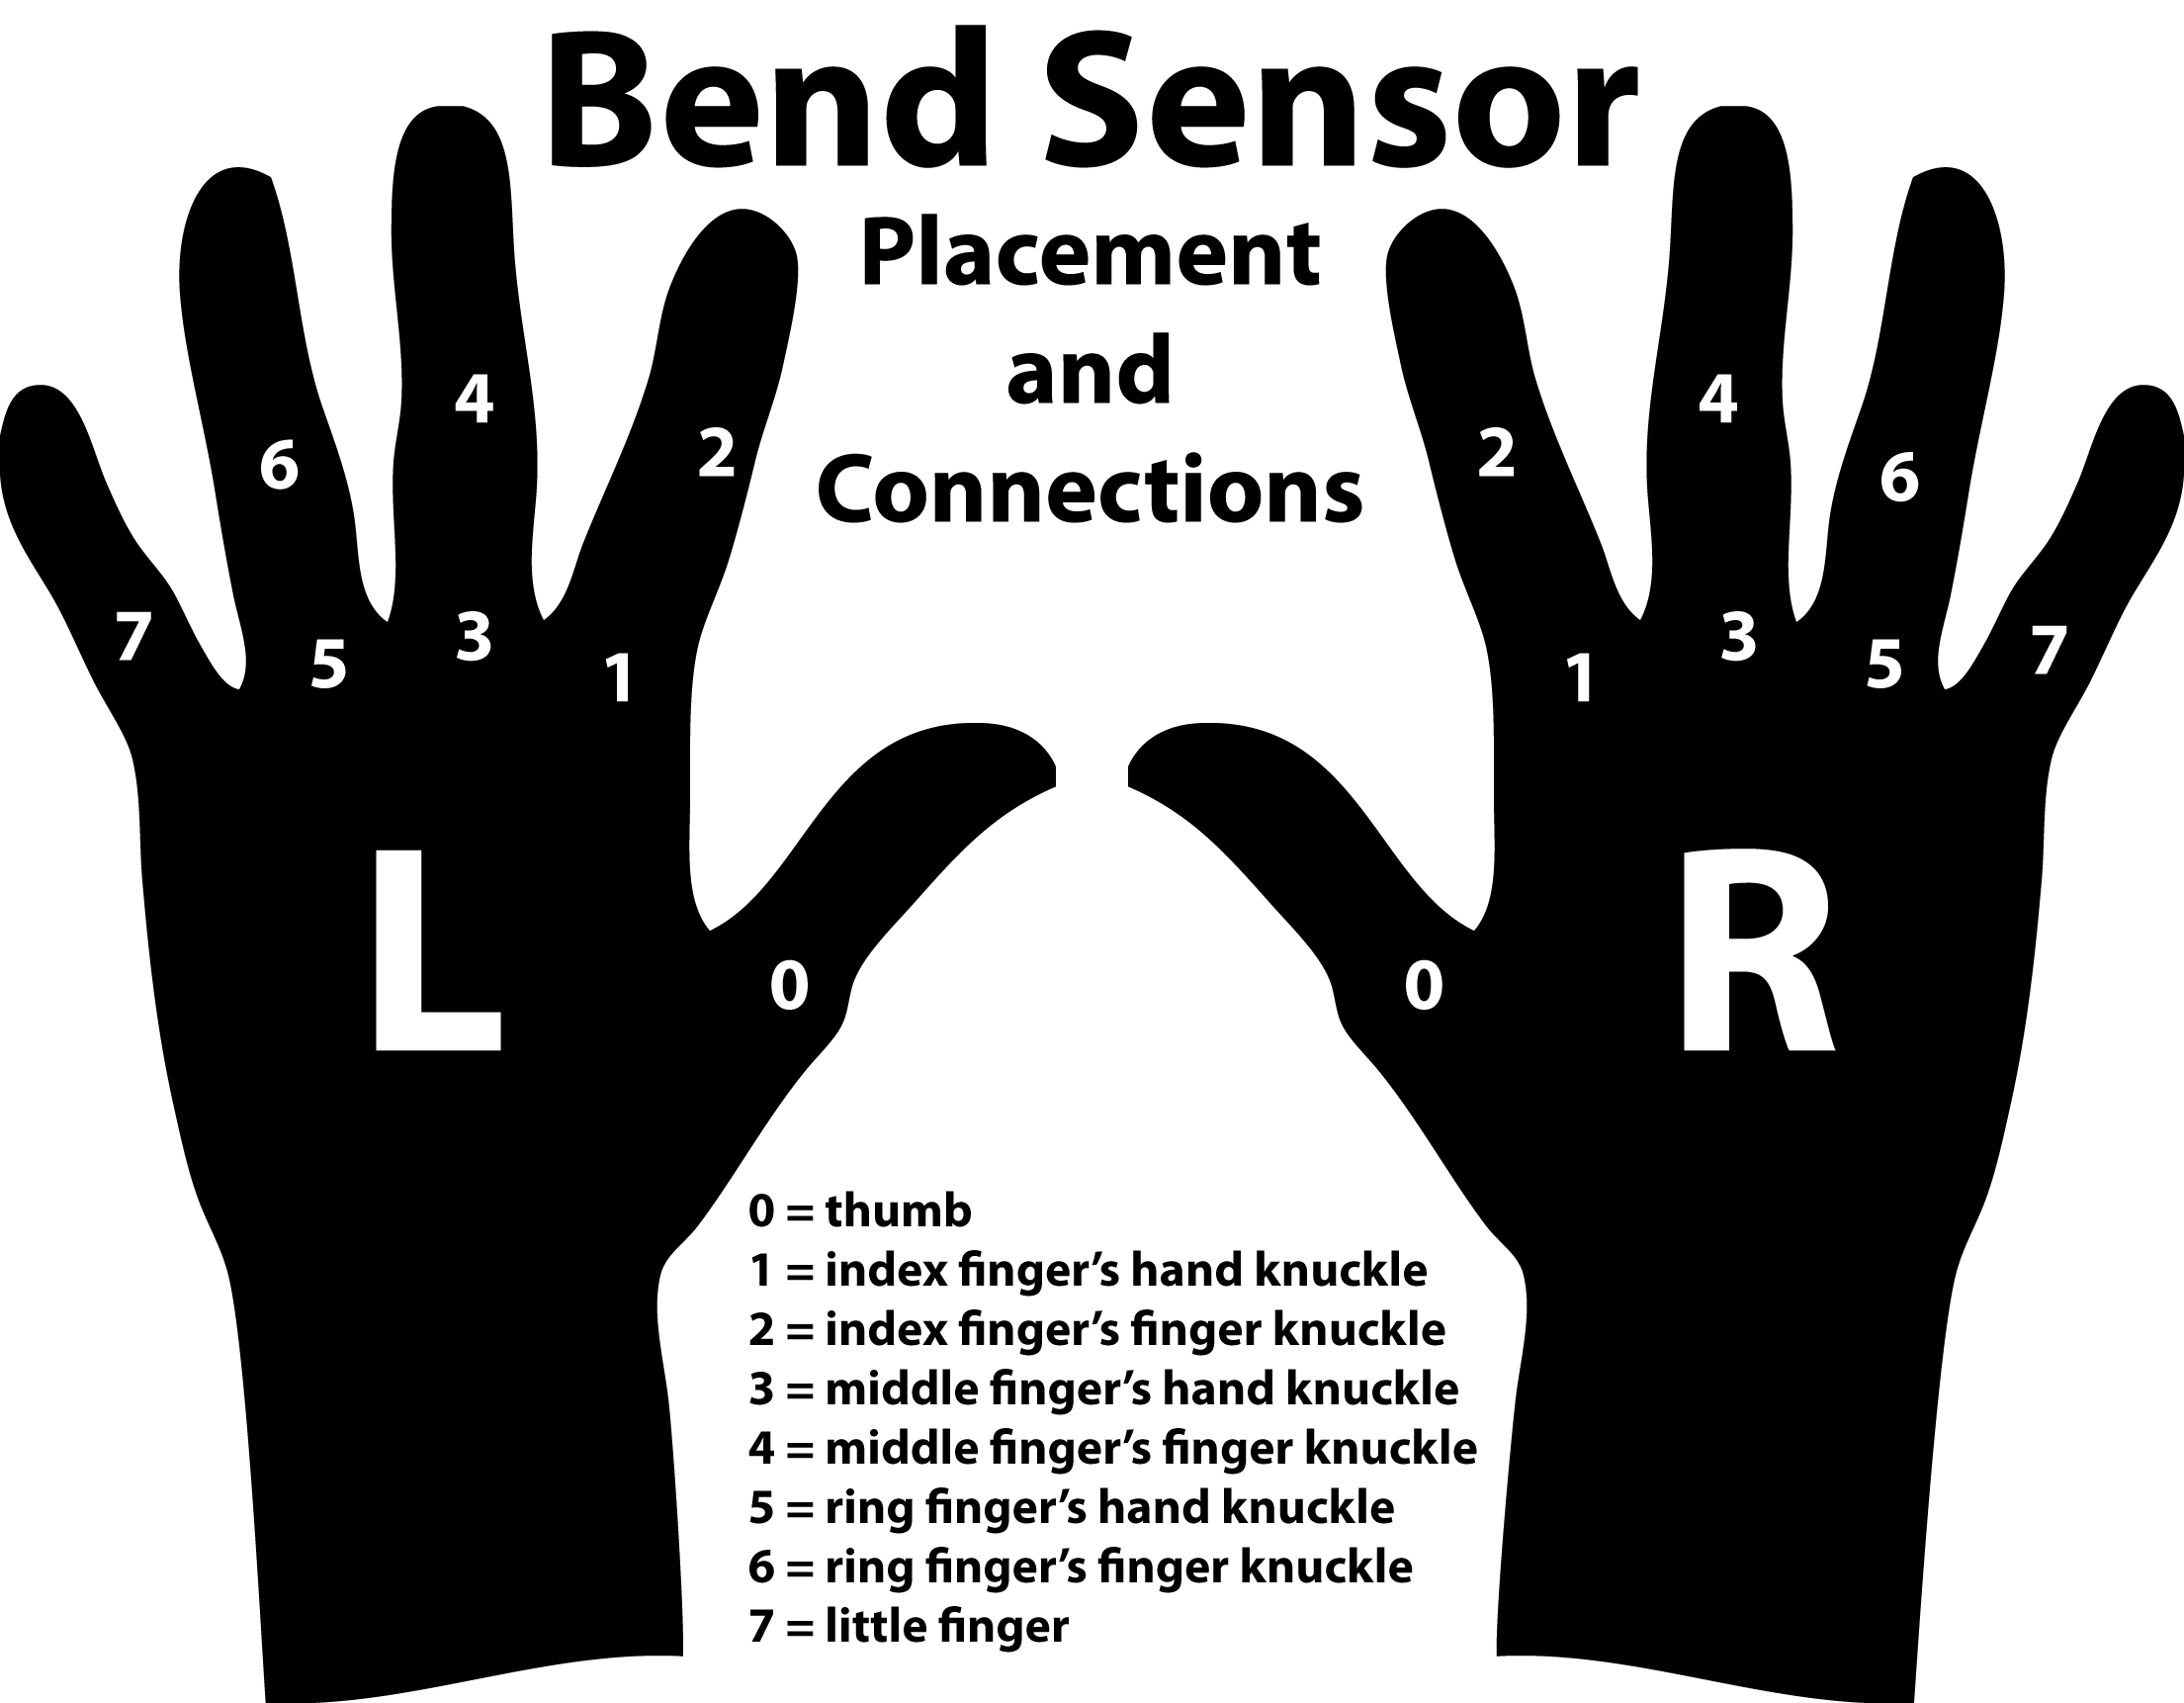
(2) Ring Button Assembly
Roughly 12 x 12 x 6mm button dimension with is good. Two 30cm long cables soldered to leads on back of button (see photos). Hole cut in shrink tube with hot-melt adhesive fused over button and then cut away to expose whole upper surface. Diameter and shrink-ratio of shrink tube to be finalized.
Parts:
- Black Button Tactile Switch, SPST 50 mA@ 24 V dc 0.5 mm >> http://uk.rs-online.com/web/p/tactile-switches/7182395/
- Shrink tube >> >> http://www.conrad.de/ce/de/product/604704
- Cable loom
Alternatives:
>> http://www.conrad.de/ce/de/product/700410
>> http://uk.farnell.com/schurter/1241-1601-11/switch-smd-push-ip40/dp/1217753
>> http://de.rs-online.com/web/p/tastschalter/7182395/
>> http://www.conrad.de/ce/de/product/700152/

Cables: two 30cm long wires that are flexible but strong to withstand minor pulls and tugs. colour marking?
Shrink Tube: need to find a way to strain-releve wires soldered to button contacts. Hole in shrink tube for access to button should be ?mm diameter.
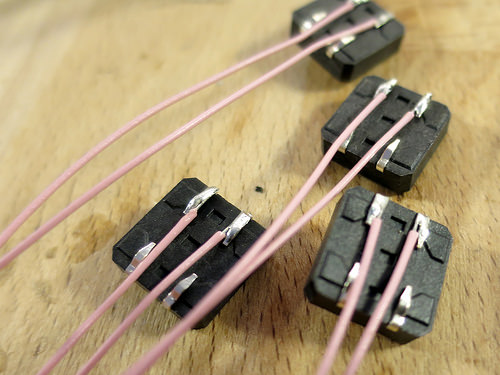

Could also be something more like these earlier solutions:
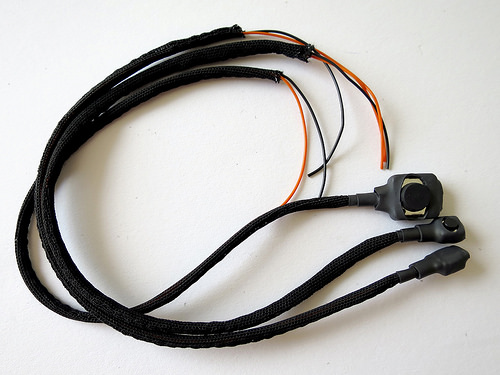
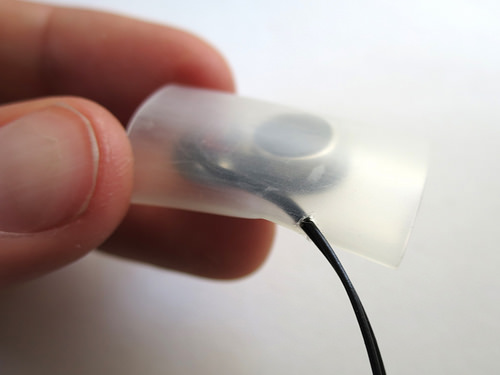
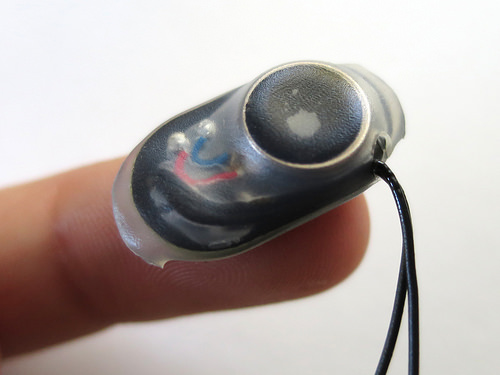
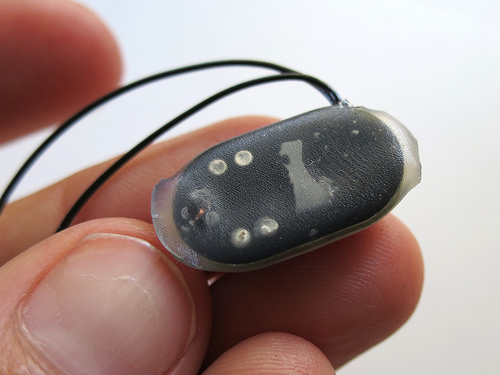
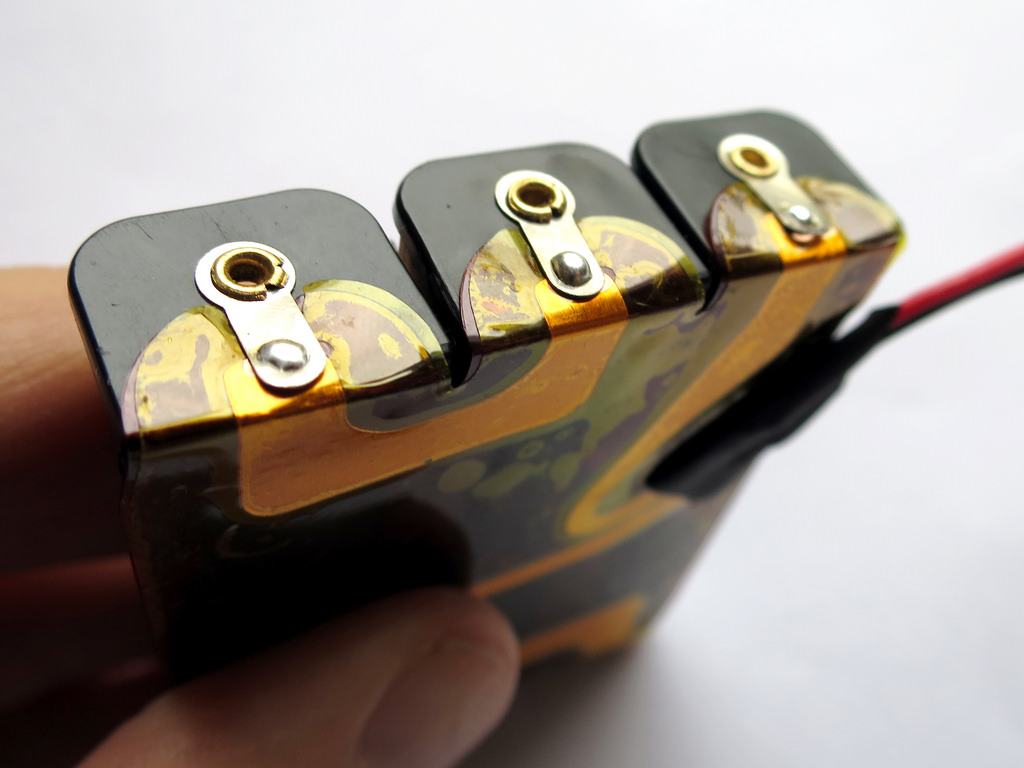
(3) Motor Board Assemblies
Parts:
- Motor board >> https://github.com/xioTechnologies/Gloves-PCB
- Motor >> https://www.sparkfun.com/products/8449
- Shrink tube >> >> http://www.conrad.de/ce/de/product/604704
- Cable loom
Cables
13cm
Shrink Tube
???
Images:
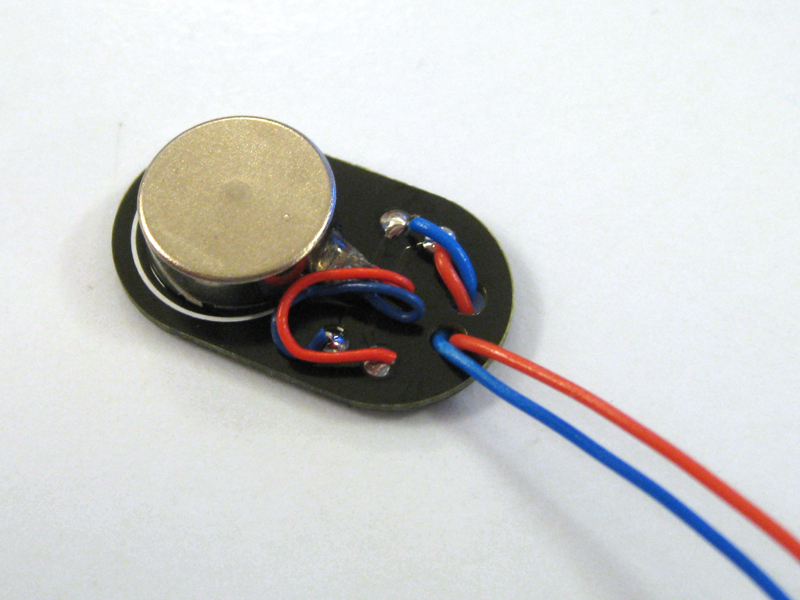
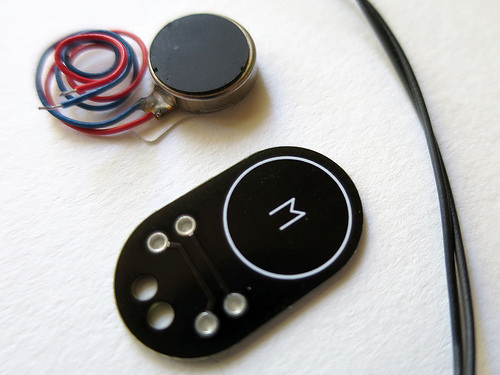
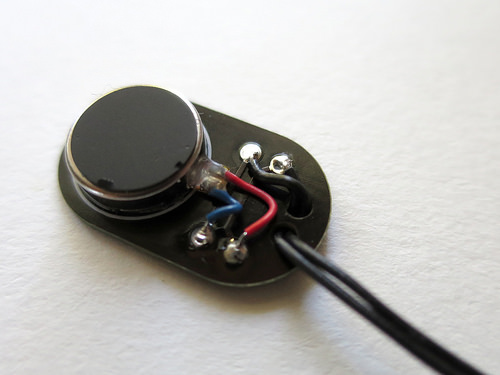
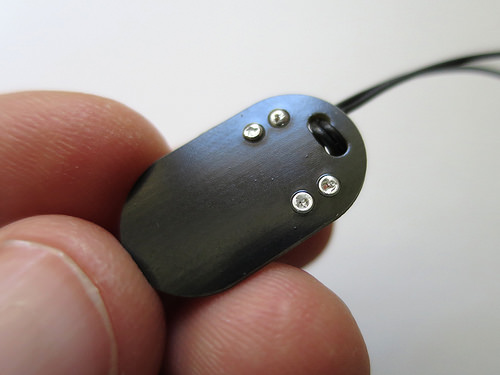
Front and back in shrink tube:
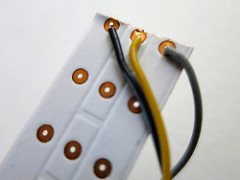
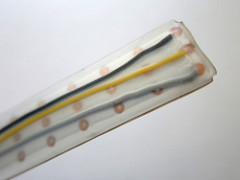
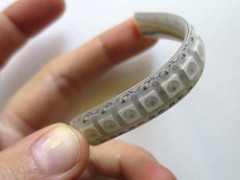
(4) LED Assembly
Three wires soldered to far end of NeoPixel LED strip. Schrink tube used in some way to cover and strain relieve wires that can run on back of LEd
Parts:
- Neopixels, 10cm strip of 13 LEDs >> https://www.coolcomponents.co.uk/digital-rgb-led-weatherproof-strip-144-led-1m-black.html#.
- Shrink tube >> >> http://www.conrad.de/ce/de/product/604704
- Cable loom
Cables
40cm
Images:
(5) AA Battery Assembly
Details >> http://theglovesproject.com/plotted-flex-aa-battery-holder/
Photos >> https://www.flickr.com/photos/plusea/sets/72157646646338654/
Parts:
See detail link above!
Cables:
Battery cables are 16cm long with JST on end.
Wiring:

MISC.
Segor
Wir koennen den von Ihnen gesuchten
Schrumpfschlauch ab Lager anbieten als Stueck zu 1,2m:
SS 6,0/3:1 IK-1,2m — http://www.segor.de/shop?Q=$:25093
oder als Boxen zu 5m;
SS 6,0/3:1 IK-Box 5m — http://www.segor.de/shop?Q=$:23244
Versandkonditionen und -spesen siehe http://www.segor.de/#/versand .
Nessel Shrink Tube
Shrink tube with glue
MIT KLEBER SR 6,4 K : 2,2 >> http://www.nessel-elektronik.de/PolyOlefine/polyolefine.html#MIT-KLEBER
Autec Shrink Tube
for bend sensor assembly:
DERAY®-IAKT 3:1 6mm -> 2mm schwarz
DERAY®-I3000 6,4mm -> 2mm schwarz
for ring button assembly:
DERAY®-IAKT 3:1 12mm -> 4mm schwarz
DERAY®-I3000 9,5mm -> 3mm schwarz
DERAY®-I3000 6 12,7mm -> 4mm schwarz
Conrad Shrink Tube
with glue for button ring >> http://www.conrad.de/ce/de/product/604704
no glue for bend sensors >> http://www.conrad.de/ce/de/product/530905
Fabric Cable Covers
Plus cable covers for ringbutton…
Geflechtschlauch Polyester:
501001 GS-3 Innendurchmesser 1,00mm
501002 GS-4 Innendurchmesser 2,00mm
501003 GS-5 Innendurchmesser 3,00mm
501004 GS-6 Innendurchmesser 4,00 mm
[…] >> http://theglovesproject.com/hardware-assembiles/ […]