Step 9: Callibrating and Programming
This step describes how to callibrate your ArduIMU senors (accelerometer, gyroscope and magnetometer) and save these calibrated values to the EPROM memory of the Arduino (Atmel chip). It also describes how to upload Arduino code to the ArduIMU.
Calibrating IMU Sensors and Writing to EPROM
Documentation in progress… (contact Seb for details)
Uploading Arduino Code to ArduIMU
1) Download and install the latest version of Arduino
>> http://arduino.cc/en/Main/Software
2) Download Arduino sketch that reads and sends data
Seb’s GitHub >> https://github.com/SebMadgwick/ArduIMU-Gloves
Comment in/out as required in FlexSensors.cpp:
channel[0] = analogRead(A0);
channel[1] = analogRead(A1);
channel[2] = analogRead(A2);
channel[3] = analogRead(A3);
//channel[4] = analogRead(A6);
//channel[5] = analogRead(A7);
}
3) Program the ArduIMU
- open “ArduIMU_Glove” sketch in Arduino
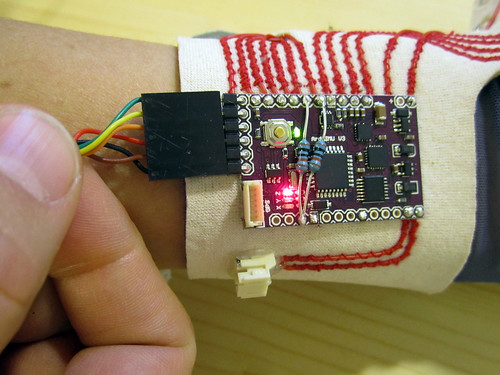
- connect ArduIMU to computer with FTDI cable
- select “dev/tty” from Tools -> Serial Port menu
- ArduIMU does not show up in the list of Arduino boards to select from, but I find it works to program when you select “Arduino Pro or Pro Mini (5V, 16MHz) w/ATmega 328″ from Tools -> Board menu
- upload sketch
[…] Glover GUI >> http://theglovesproject.com/step-12/ Uploading code to ArduIMU >> http://theglovesproject.com/step-10-callibrating-and-programming/ ArduIMU Making-of >> […]
Hey Seb, Can u please e-mail me the documentation for “Calibrating IMU and saving it to EPROM”.
Thanks
[…] Glover documentation >> http://mimu.org.uk/w/index.php?title=Main_Page Programming ArduIMU >> http://theglovesproject.com/step-9/ […]